Linking
Table of contents
A link in Dash can be thought of as a bidirectional connection between two documents, or a reference to one document from another. It is also a document in itself, meaning that we can add tags and other key/value pairs. The same source selection (called an anchor, i.e., a persistent selection) can link to multiple destination anchors. In addition, source and destination anchors can both range from the entire document to a portion of a document (i.e., a phrase within a long text document, an annotation on a pdf, a selection on an image, etc).
We now describe two different mechanisms for creating links; we begin by describing document to document links. More information on linking between selections within documents can be found here.
Creating Links - “Drag and Drop” Method
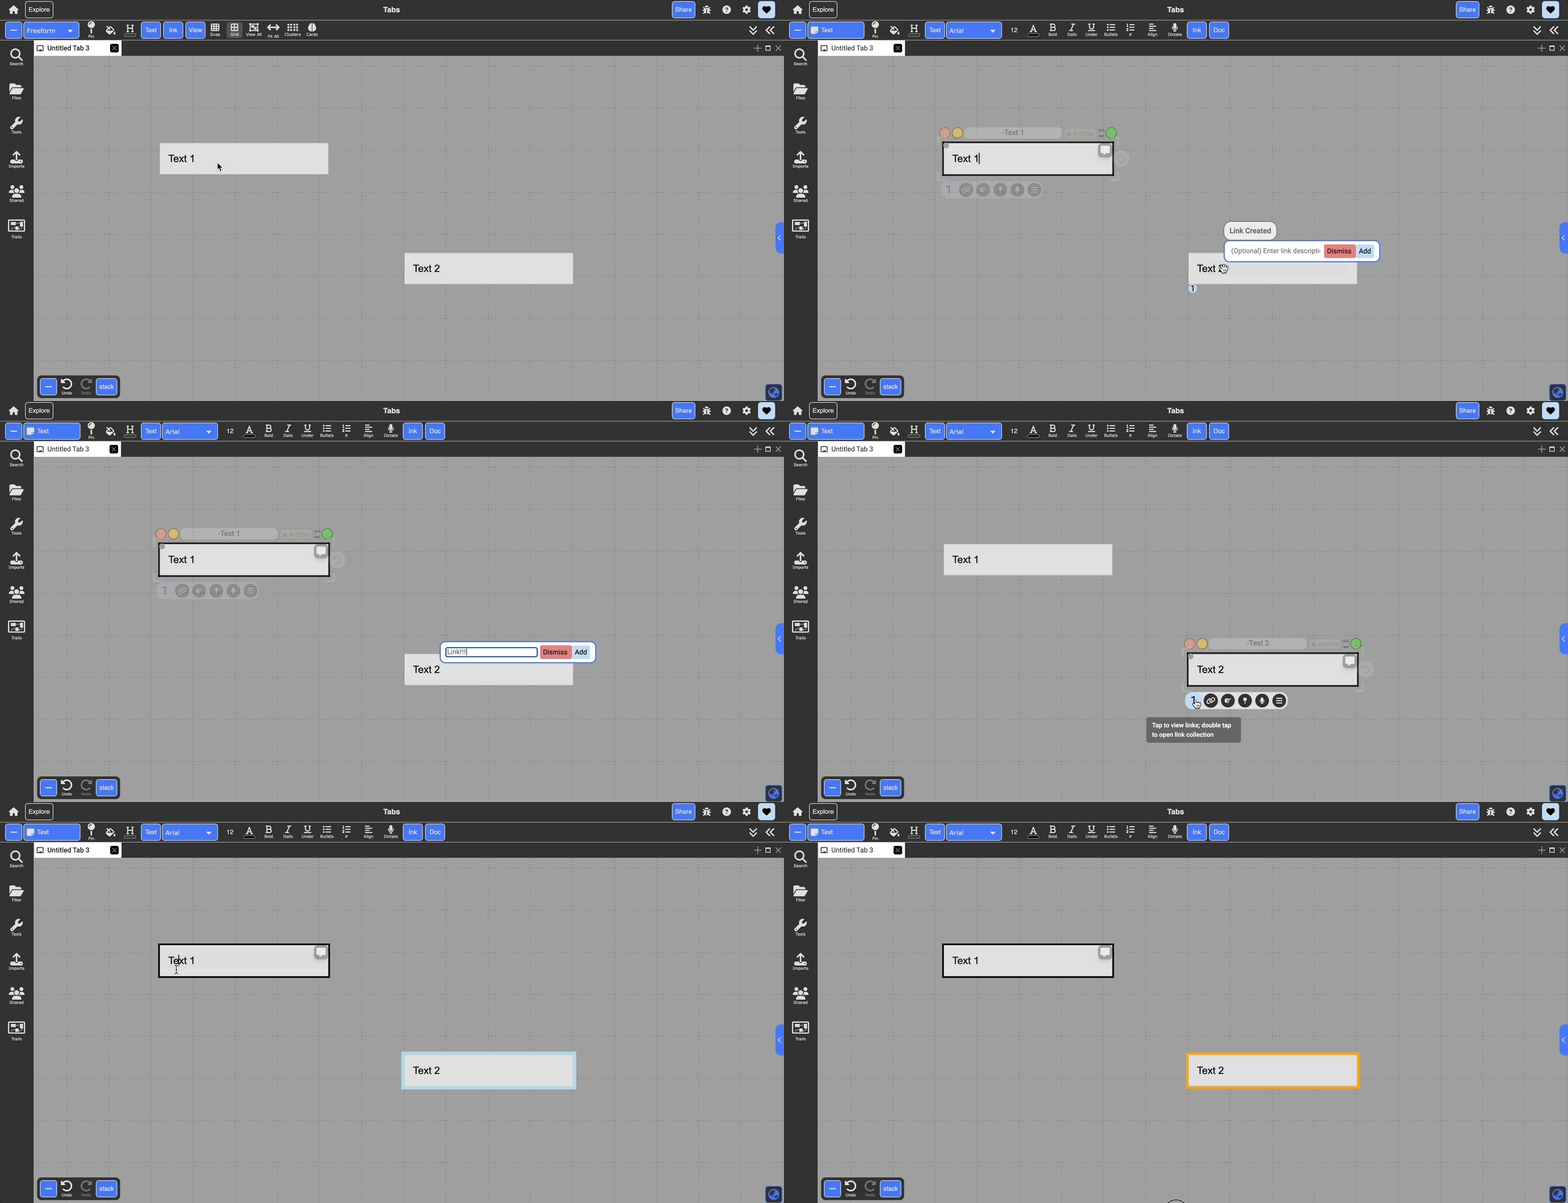
There are two methods of creating links. The first is “drag-and-drop”, which is a light-weight method good for creating a one-to-one link between documents that both appear on the screen at a given time, whether in the same tab or in two different tiles.
- Select the desired source document and navigate to its bottom toolbar of icons.
- Click and drag the link icon (the “make link” button), then drop it onto the desired destination document.
- After the link is created, two messages will appear on the screen:
- The upper message notifies that a link was successfully created, and will disappear after two seconds.
- The lower message displays an input box to enter an optional description for the link - it typically is an explanatory word or short phrase describing the link. Pressing enter on the keyboard or clicking the add button will add the label to the link, and clicking anywhere else outside of the message or clicking the dismiss button will cause the message to disappear.
- If users do not enter a link label on creation or wish to modify the label after creation, it can be done through the link menu (described in the subsequent editing links section).
- Once a link is created, if there are no existing links on the document a blue dot will appear on the bottom left corner of the document containing the number of links that exist on the document (you can see this dot by hovering over the document or clicking on it to invoke its document crhome). This counter is incremented for each additional link created. More information on this dot and its functionality can be found here.

Creating Links - “Linkboard”
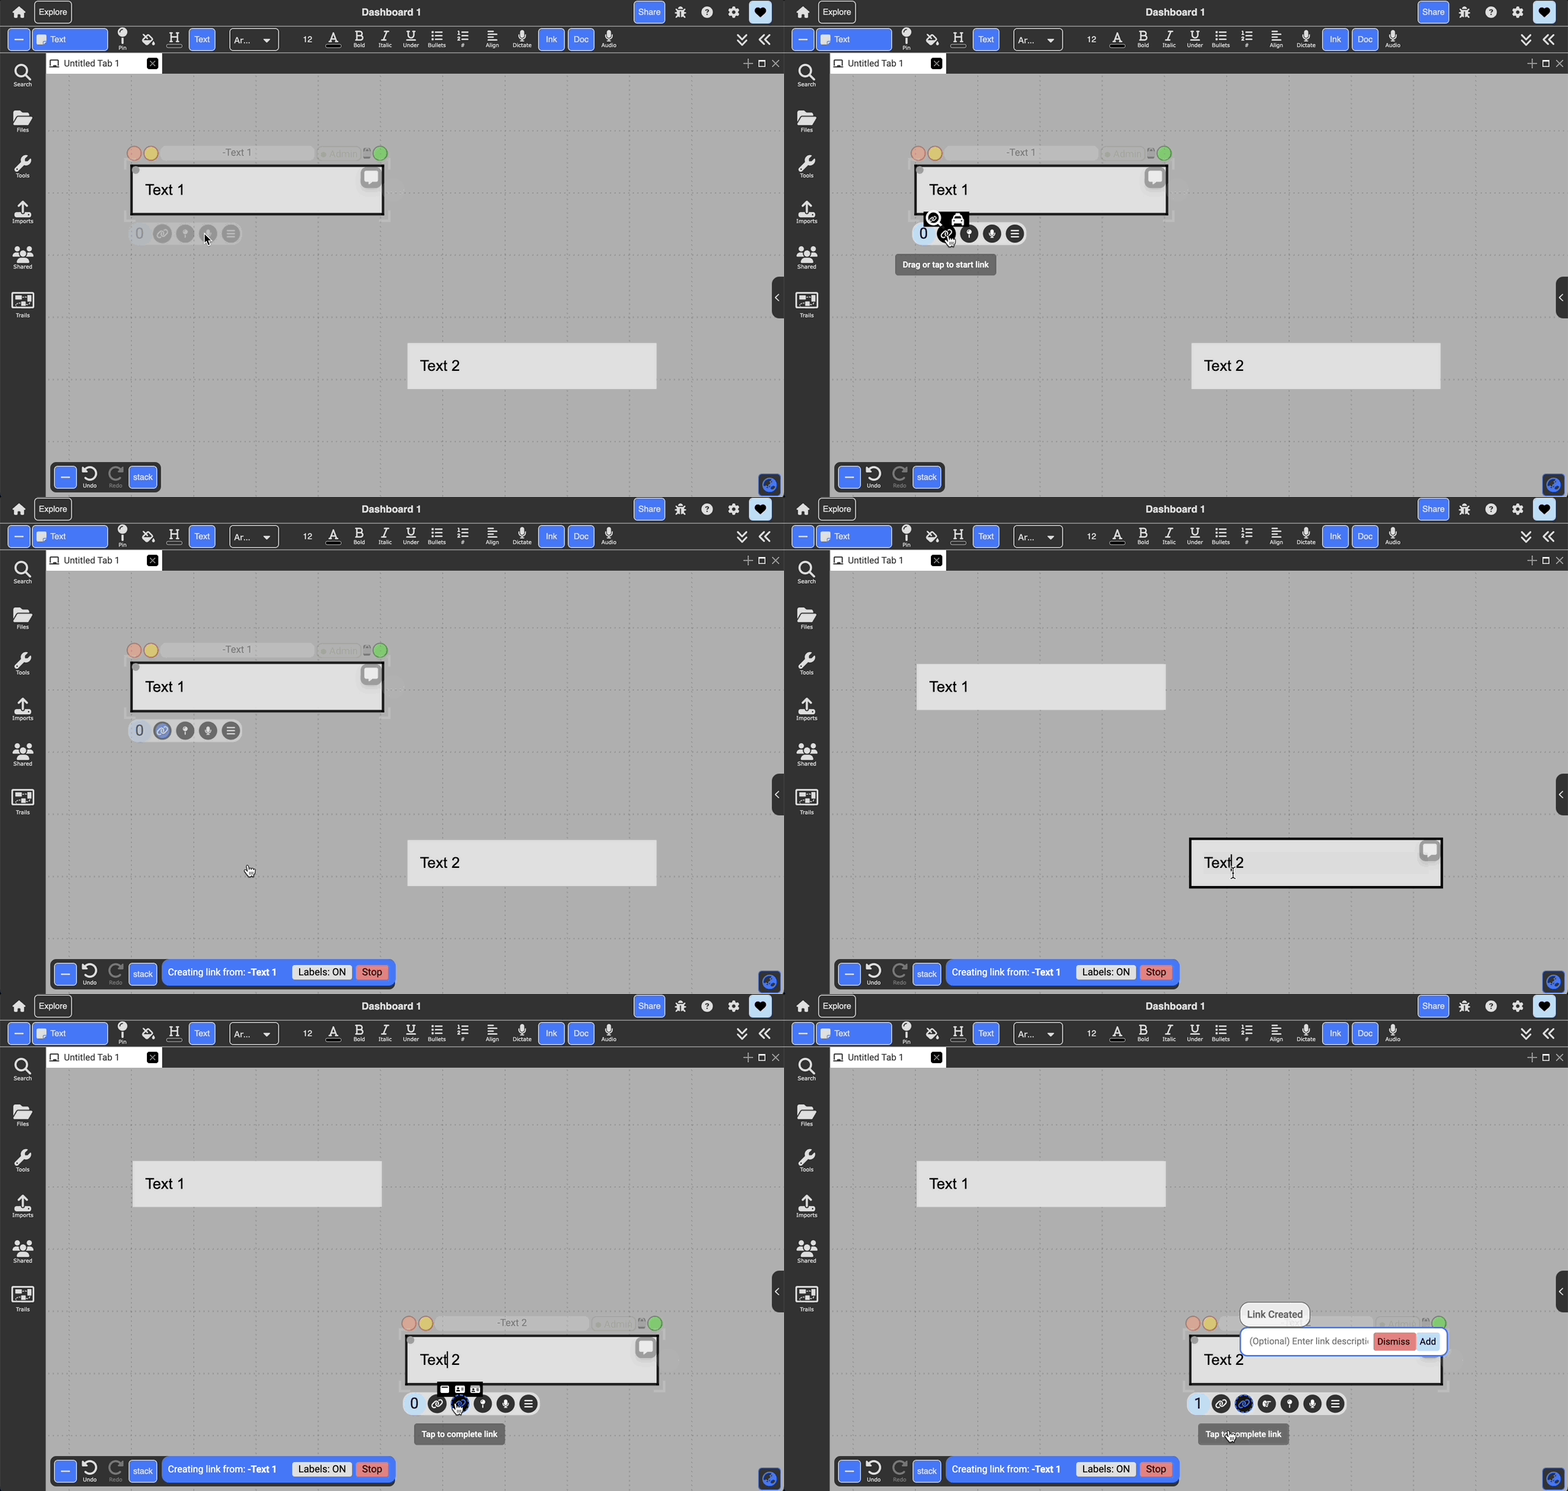
You can create links with the “linkboard,” which is convenient for creating many links with the same source and for creating links while maintaining another workflow. This functions as a clipboard (similar to copy and paste) for links in the sense that your source is always “copied” to the linkboard until you clear it or “copy” another source.
- Same as the first method above, select the desired source document and navigate to its bottom toolbar where three icons are present.
- Then, left-click on the make link button. This turns the document into a source document for links to be created from. The make link button will turn grey with a red outline, and the middle icon (the “end link” button) will be activated, indicated by a black background.
- In addition, a popup bar will appear at the bottom of the screen, next to the shortcut buttons. This popup displays the current source document’s title and allows users to change certain linking preferences using the two grey buttons:
- Complete the link by clicking on the complete link button in the bottom toolbar of the desired target document. Clicking this complete link button on any document that is not the source document will create a link between the source document and that document. Clicking on the complete link button on the source document will do nothing.
- At any time (whether there is a source on the linkboard or not), clicking the start link button (the first button in the bottom buttons of the document) will make that document the source for links. If there was already a source on the linkboard, that source will be cleared and the selected document will become the new source. When there is a source on the link board, the user can go about their workflow normally. They can continue to select and interact with documents as they normally would and view and edit existing links as well. The only difference is that when there is a source on the link board, the stop link button is active and the user can no longer make “drag and drop” links from the source (because clicking that button again will clear the source), however the user can still make “drag and drop” links from any other document.

Editing Links:
- Once links are created on a document, a blue link dot appears in its bottom left corner containing the counter that shows the number of links on the document:
- Clicking on the blue link dot will open a link menu that displays each link on the document in a list. Each link is shown with an icon representing the type of document that the link is to and the title of the document that is on the other end of the link:
- Hovering over an item in this link menu displays several options for the link. First, hovering over the title produces a blue underline which indicates that the title is a hyperlink that can be clicked on to follow the link (more information here). Hovering over the title also shows a preview of the destination document:
- Hovering over an item in the link menu also makes three buttons on that link visible:
- The leftmost button is to toggle on/off the link as a dotted curved path between the two documents (link path).
- Clicking on the rightmost button deletes the link. Deleting a link deletes it on both the source and destination documents. If a document contains only one link, and that link is deleted, the blue link dot at the bottom left corner will disappear, and will only reappear when another new link is created on that document.
- The middle button is to edit the link’s properties. Clicking on the button to edit the link will invoke a link editor:
- In this link editor, the user can edit the link label that they added on creation of the link (or add a link label if they chose to not add one). The label will be added to the link when the user clicks the set button or hits enter after typing in the label box. When the label is added, the set button will turn green for 2 seconds to indicate to the user that the label was added. When a link label has been added, it will be shown in the link menu, right underneath the title of the destination document:
- The user can also set a link relationship or choose one of their existing link relationships. All the links in the same relationship have the same link path color. Link paths have weights corresponding to their relative importance (i.e. number of links contained in the relationship)
- The user can also choose to modify the follow behavior of the link (a type of “view spec”). Following a link takes the user to the destination document. The link editor allows the user to select different follow behaviors from this dropdown menu:
- The default option is to pan the screen to the destination document if both documents are in the same collection and otherwise opens it in a new tile on the right side of the screen.
- Additionally, the user can click the arrow in the top right corner of the editor to display/hide more information about the link
Additional Link Functionalities
- Linking selections within a document: For text, pdf, webpage (linking with Hypothes.is), image, audio (linking with audio) documents, the user has the option to link a specific selection within a document (anchor) to another document: - Text In order to link a piece of text in a document, the user must select the text and then drag the link icon to the document that they want to link it to (shown below). As of 8/10/2020, the “linkboard” method (clicking the start link and complete link buttons) is not yet supported and using this method will link your entire text document to the destination. Once the text anchor is linked, it turns blue and will show a blue underline on hover. The user can click on the linked piece of text to preview the destination document and use the two buttons at the top right corner to delete and follow the link. (*external hyperlinks to websites outside of Dash will always show a blue underline so that they can be differentiated from internal links within Dash) - Image/PDF/Web In order to link a portion of an image, PDF, or webpage, the user must first create a selection on the document. This can be done by right clicking and dragging over the area that the user wants to select. Once the user has made this selection, they can treat the selection as a document and use its bottom buttons to create links normally (not shown in gif).
- Following Links: In order to follow a link on a document, you must click on the title of the destination document in the link menu. Clicking on this and “following” the link will show you the destination document of this link, based on the specified following behavior (following behavior).
- Showing Links and Labels: In the link menu, there is an option to visibly show the link. Clicking on this option will show a dotted path between the two documents that are linked. If there is a link label on this link, it will appear on the dotted path. The user can also move the link label around this path and position it where they want.